Advent Calendar 5: Mulled Cider

Sometimes the world is out to get you. Hard days and long nights don’t take a holiday because it’s Christmas. Therefore, here is a recipe that will cute your ills, soothe and warm you, and get you well on your way to being merry.

Mulled Cider

  • 1 litre still dry cider (I used Snakecatcher by New Forest Cider)
  • 3 cloves
  • 2 star anise
  • 1 cinnamon stick
  • 1/2 vanilla pod, split
  • 1/8 tsp ground nutmeg
  • Juice of an orange
  • 50ml calvados
  • 50ml pomegranate juice
  • 3tbsp caster sugar

Warm up the cider until steaming. Meanwhile, measure out your dry and wet ingredients.

Chuck in your spices and juice/booze mixture and give everything a good stir. Bruise the cinnamon stick and vanilla pod with your spoon as you do so.

Bring the pot up to a boil, then turn it back down to a simmer for 5-8 minutes

Serve piping hot in heatproof cups.

IMG_6788

This recipe is based on Jamie Oliver’s recipe for the same, with a few measurements tweaked, and an extra dose of booze to warm your cockles. It’s a damn good recipe, so I didn’t need to muck about with it much. Sweet, fruity, boozy and oh so quaffable- this is going to be my go to mulled beverage this year.

Enjoy!

sigdraft

Advent Calendar 4: Christmas Cake

If you are anything like me, then the year has gotten away from you, and half a moment ago it was halloween, and you were overdue for making your Christmas cake, and now, BAM! It’s December 4th, and you still haven’t done it. Do not despair, dear ones. It is not too late.

Contrary to popular belief, you don’t *need* to make a Christmas cake months and months in advance. Sure, you get more time to feed it to boozy godliness if you do, but it is not essential. So long as you make your cake 3-4 weeks before the big day, you will have plenty of time to get in plenty of feedings to have a delicious, brandy spiked delight to serve on Christmas Day.

The recipe below is adapted from Delia Smith’s age old and much loved Christmas cake recipe. I’ve really only removed the nuts (I prefer the texture nut free, personally), tweaked the spices to my preference, and altered the fruit a little (cranberries > currants).

Christmas Cake

  • 750g dried fruit (you can pretty use whichever dried fruits you like in this mixture. I used approximately 100g glacé cherries, 200g sultanas, 200g raisins and 250g dried cranberries)
  • 50g candied peel
  • 3tsbp brandy
  • 225g plain flour
  • pinch of salt
  • 1/2tsp ground ginger
  • 1/2tsp ground cinnamon
  • 1/4 tsp ground nutmeg
  • 1/4 tsp ground cloves
  • 225g butter
  • 225g soft brown sugar
  • 4 free range eggs
  • 1tsbp treacle
  • Zest of 1 lemon and 1 orange

9-12 hours before you want to make the cake, or the evening before, weigh out the fruit into a mixing bowl (If you like, you can chop your cherries, but I prefer them as whole gleaming jewels in the finished cake). Drizzle the brandy over the fruit and stir to ensure all the fruit is coated. Cover the bowl with a tea towel and leave the fruit to steep. If you are able, the odd stir during this process will only help the absorption.

IMG_6780

Preheat the oven to 130-140c and double line an 8 inch cake tin with greaseproof paper. Prepare a double layer of greaseproof to sit on top of the cake in the oven too. This will help protect the cake from over-browing during its long and slow baking.

Weigh out your flour and measure out your spices. Sieve or whisk together to remove lumps.

In another bowl, cream together the butter and the sugar. Beat the eggs, and mix into the butter mixture in 2-4 parts until completely incorporated.

Add the flour mix into the wet ingredients and fold to combine.

Finally add the zest, treacle and fruit, and fold into the mixture until it is uniform.

Pour the cake batter in the prepared tin, cover with the paper ‘lid’, and pop it in the oven for 4 and 1/2 hours. If your oven is particularly fierce, check at 4.

Allow to cool completely in the tin before removing the cake to an airtight container. Poke the cake full of holes with a toothpick, and drizzle in a healthy plug of brandy. Repeat this process at least once a week until you are ready to ice the cake, flipping the cake over each time to ensure an even feeding.


Like a lot a festive recipes, this cake is super easy, it’s just time consuming, and contains a lot of ingredients. Making your own Christmas cake is a labour of love, and will rapidly become a tradition in your household, if for no other reason than the phenomenal scent of it baking for hours on end. With so many steps before the cake is baked, and after, theres plenty to get the whole family involved in. If you are tee-total, use strong tea instead of brandy in the first step, and simply don’t feed the cake. It will keep well enough if it is kept airtight.

Enjoy!

sigdraft

Cosy Crumble

Halloween has been and gone. Guy Fawkes’ Night is almost upon us. Christmas is just around the corner. Comfort food season has truly arrived.

When it comes to comfort food, some of the best dishes, whilst simple, take a long time cooking. That’s fine- gives you time to get on with Christmas card lists and catching up on Downton. However, I work pretty much full time, I’m surprisingly lazy, and I want my comfort food done quick. When it comes to main meals, that often means reheating portions, or pasta for me. When it comes to dessert, it means crumble.

You can’t go wrong with an apple crumble- they’re universally popular and extremely versatile. Autumn is apple season, but they are readily available all year round and as such are a kitchen staple, as are the rest of the ingredients in this simple but delicious pudding. Frankly, anyone who doesn’t like crumble is probably a cyborg, anyway, and as such should be cut from your social circle.

Here’s how I make a dessert in minutes, that goes in the oven to cook as soon as the main meal is out. Apologies for imperial measurements- this is how I was taught to make crumble by my mum, and it’s how I remember it.

IMG_6556


Cosy Crumble

  • 4oz Butter, cold
  • 4oz Caster sugar
  • 4oz Plain flour, plus an additional 1-2oz as required
  • 1tsp Cinnamon
  • 5 Eating apples (I used Braeburns. You can use cooking apples, but you will probably only need four, and you may wish to add additional sugar
  • Juice of half a lemon
  • 4oz Sultanas
  • Demerara Sugar and a further scant tsp Cinnamon to finish


Preheat the oven to 180c, or use a hot oven following cooking a main meal.

Rub the butter, caster sugar and flour together with your fingertips to form a crumbling crumb. If the mix is too soft and wet, add the additional flour an ounce at a time and try to crumble it again. Once the mix is working, don’t be too pedantic about crumb size. You don’t want to overwork the mixture, and I like the rustic look.

Next, peel and core your apples. Chop into bite size pieces- about 12 chunks per apple. Place the apple in your ovenproof dish, and acidulate as you go with the lemon juice.

Scatter over the sultanas, a good pinch of Demerata sugar and some cinnamon (a scant 1/2 tsp should suffice), and briefly mix the contents together. Try to even out the top a little.

Pour over the crumble topping in a thick layer, and sprinkle with another hefty pinch of Demerara and another scant 1/2 tsp of cinnamon to finish.

Bake for 30-35 minutes, until the top is crisp and slightly caramelised. Serve with lashings of custard, cream or ice cream, and scoff greedily.


If you really HATE sultanas, of course you can omit them. However, they plump up beautifully, and add a beautiful depth of flavour, and amber jewel tone quality to the dessert.

Go make this. RIGHT NOW.

Love and cuddles!

sigdraft

Vanilla Latte Cake

I’ve said it before, and I’ll say it again; you’d be hard pushed to find a cake that isn’t improved by a splash of vanilla. This goes double for coffee cake.

I’m one of THOSE people. I take syrup in my coffee. Don’t get me wrong, I like my coffee long, strong and life giving, but I’m not sweet enough to take it with out a little sassy sugar hit. My go to drink if I’m caught at a coffee joint I’m not familiar with is to order a Vanilla Latte. I’m usually going to be safe with that. So, when I was making a coffee cake not so long ago, I thought, hang on… I can make this BETTER.

So I made a light coffee sponge, sandwiched it with a whipped coffee-vanilla buttercream that’s got so much java in it, it could wake the dead. Ta daaah. You’re welcome.

Vanilla Latte Cake

For the cakes:

  • 225g Butter
  • 225g Light muscovado sugar, caster sugar or a blend of both, depending on your supplies
  • 225g Self-raising flour
  • 1tsp Baking powder
  • 2tsp Vanilla extract
  • 4 Free range eggs
  • 4tsp Instant coffee
  • 1tbsp Boiling water

For the buttercream:

  • 150g Butter
  • 350g Icing sugar
  • 1tsp Vanilla extract
  • 4tsp Instant coffee powder
  • 1tbsp Boiling water
  • Cocoa powder to finish

Preheat your oven to 180C or the equivalent. Grease and line two 8inch round cake tins.

Boil the kettle, and add the boiling water to the first lot of coffee powder in a small container. Mix together until all the coffee is dissolved into a syrupy consistency. Set aside.

Cream together the butter and the sugar, then mix in the remaining ingredients until a uniform and smooth cake batter is formed.

Finally, mix the coffee syrup into the batter evenly, then divide the mix between the two prepared tins.

Bake the cakes for 25-30 minutes, until an inserted skewer comes out clean and the cakes are shrinking from the edges. Allow to cool in their tins, or on a rack.

When the cakes are cold, you can either leave them as is for a fatly layered cake, or slice each cake in two and have a four layer cake. If in doubt or lacking confidence or time, do the former.

With the boiling water, make up another batch of coffee ‘syrup’.

Beat together the butter, sugar, vanilla and coffee until a thick, luxurious buttercream forms. spread a quarter of the icing over the bottom layer of the cake, then top it with a next, and so on, until the top, where the remaining generous quarter should be spread evenly then swirled for a pretty finish. Dust with cocoa powder to complete the whippy latte look, and serve this aromatic delight with coffee or tea.


I wish I had a picture of this delight to show you, but what with camera issues this year and how fast this cake vanishes, I simply don’t. Trust me when I say that this cake is as aromatic and delicious as it is pretty. It’s perfect for celebrations- I find all multi layer cakes a bit festive. If you want to kill with kindness, make an extra sponge (so half the recipe), and stack them up with oodles of icing (one and a half to twice the recipe above) for a true monster that will drop jaws. The amount of buttercream yielded from this recipe is enough for generous layers between the cut cakes, and on top, but if you want to cover the whole cake, which looks a little more polished, make one and a half times this amount, or double to be on the safe side.

I’ve made this cake for a friend’s birthday, and given one to a non-profit event, and in both cases they flew. It’s a real crowd pleaser, and you deserve to make one for yourself.

Enjoy!

sigdraft

Red Berry Pavlova

I love meringue. As a child, when my brother and I went with a parent to the baker to buy bread for the weekend, we would often be allowed a treat. Hot sausage rolls were one of our favourites (and I’ve never had one better, even if I can’t really process pork and they made me ill in the long run), but if we went for sweet things, I would nearly always pick a meringue pig, or dog, or sheep, or whatever animal they were doing that day. There’s something so perfect about the crisp outer shell yielding to gummy, soft, insides. Fluffy and crunchy and so, so sweet and light. Mmmm.

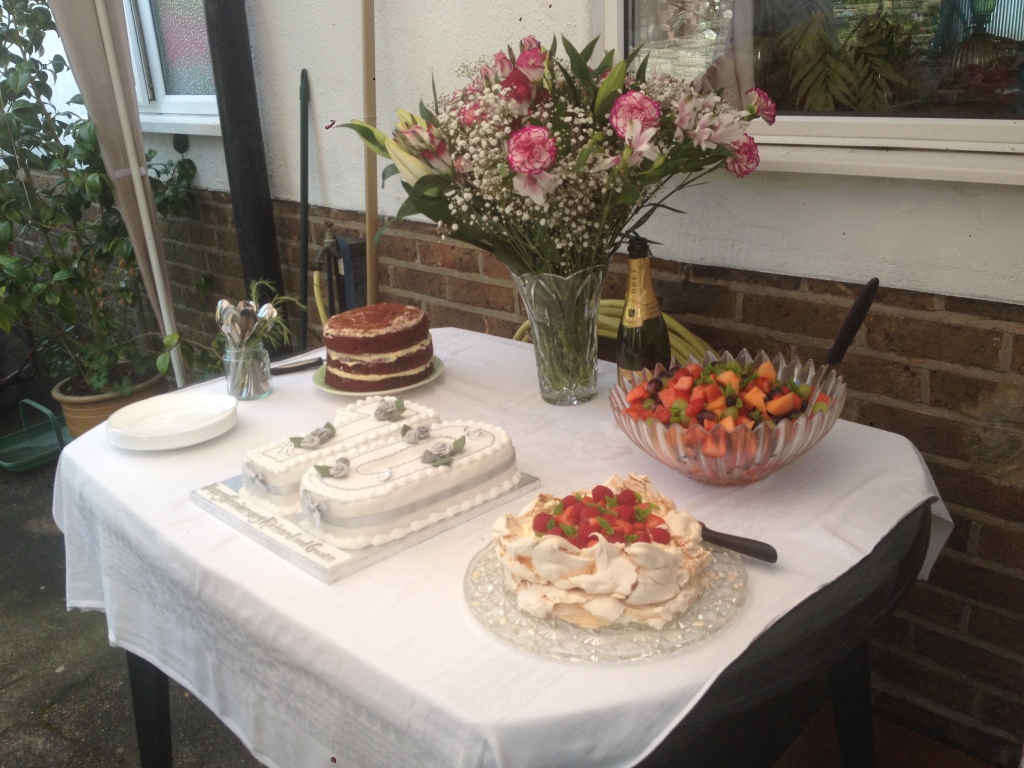
For a big family party, I volunteered to make a few desserts. One was the lovely fruit salad I shared a week or so ago. Another was a fabulous three tiered red velvet cake. The third was a sumptuous double layered Red Berry Pavlova.

photo-22

This is originally a Jaime Oliver recipe, and boy did good. I’ve never had much luck making my own meringue in the past, but this time it came out perfectly. The only thing you really need for a pavlova is time. This meringue recipe would work perfectly for individual nests or biscuits too, but here’s how I made my pavlova.

Red Berry Pavlova

  • 6 Egg whites
  • 300g plus 2 tbsp Caster sugar
  • Pinch of salt
  • 400g Strawberries, hulled and halved
  • 400g Raspberries
  • 400ml Double cream
  • Plenty of sprigs of fresh mint

Preheat the oven to 150c. Line 2 baking sheets with greaseproof paper, and outline a 20cm/8inch diameter ring on each with pencil.

Either in a stand mixer or in a bowl with an electric whisk, beat up the 6 egg whites at a medium pace, until you reach firm peaks.

Next, add your salt, then gradually add your sugar about 1/6-1/4 at a time, all while the beaters are going.

Once the sugar is incorporated, whack the speed up really high- damn near as high as it’ll go, and beat the meringue for 7 minutes. The transformation will be incredible- the mix will become voluminous, thick, stiff and bright white. After seven minutes test the meringue for graininess. No grains means you’re good to go. If not, beat it for a minute or two more.

Spread your meringue into rings on the baking sheets. I like to make a well in the middle with a higher, crown like rim. Use your stencil as a guide for size, and bear in mind the meringue will expand further in the oven.

Bake for 1 hour- they should be risen and ivory. Turn off the oven. Moisture is the death of meringue, so my advice is to cool the meringues in the oven, but you could cool them on a rack if you are in a rush.

When you are ready to assemble the pavlova, whip the remaining sugar and all the cream to stiff peaks and spread half of it on the bottom meringue ring.

Stud the middle layer of cream with half the strawberries and raspberries- any slightly ugly or softer ones can go here.

Sit your second ring of meringue on top of the first, top with the rest of the cream and the remaining berries. Decorate with sprigs of fresh mint. Serve immediately, or refrigerate in an airtight container.


This dessert is special, yet not particularly difficult, particularly if you use a stand mixer. You just need to be able to tell what stiff peaks are (if in doubt, youtube is full of tutorials) and the rest of the work the mixer and oven do. When I stayed in New Zealand, they had pavlova after nearly every sunday roast or big family meal- they just stuck the meringue in the oven after the main meal was done to cook in the residual heat. The method above does call for actual cooking, and you get a crisper meringue for it, but it’s certainly something you could do in the same manner.

It’s a no brainer that you can change the fruit for anything you fancy. Since you eat it fairly fresh, wet fruits like soft berries are too much of a problem. Blackberries, currants, kiwi fruit, even sweet citrus would work well here. Can you imagine a creamsicle flavoured pavlova? Oh my goodness. And the mint here isn’t just a garnish- it tastes awesome with the berries and cream.

The soft summer fruit season is coming to a close, so give this delicious dessert a go while you can.

Enjoy!

sigdraft

Sexed up Tiffin

Tiffin is the British answer to Australia’s Rocky Road- a no-bake delight full of tasty morsels bound together in cocoa-y goodness. It was invented in Scotland in the early 1900s. Though traditionally filled with a mix of raisins and biscuits, this is the twenty first century, peeps. We can do better than that. Also, loads of folks don’t like raisins, so there’s that.

My adorable pal Davi introduced me to his version of this delight a few months when he had me over for his birthday. I was hooked. When Valentine’s day came round a few weeks later, and I wanted to make some chocolatey treats for my nearest and dearest, and this sprang to mind.

A traditional tiffin is pretty basic, and can be serves as is or topped with dark chocolate. One, I think we can all guess which option I chose. Two, I decided to step things up with some extra fillings. I take my confection-making pretty darn seriously, after all, and nothing is more serious than gosh darn mini marshmallows.

Sexed Up Tiffin

  • 110g butter
  • 2 tbsp sugar
  • 2 tbsp golden syrup
  • 4 tsp cocoa
  • 225g digestive biscuits
  • 75g dried cranberries
  • 100g glacé cherries
  • 2-3 handfuls mini marshmallows
  • 300g bittersweet or dark cooking chocolate (you can use any chocolate really, but I think cooking chocolate sets better)

Line a 9×9 pan with parchment. If you trust your non-stick, you’ll probably get away with just a sheet across the bottom and up two of the sides.

In a milk pan, melt together the butter, sugar, syrup and cocoa into a delicious, dark paste. Take off the heat when combined.

Crush up the biscuits into roughly 1-2cm pieces. Retain all the crumbs and shards, as these will give the tiffin bulk.

Add your biscuits and fruits (the cherries can be chopped if you like, but they look gorgeous sliced through whole in the finished product) to the paste and mix, mix, mix. It will cover everything, I promise, you just have to be patient and mush up those biscuits as you go.

Add your marshmallows and mix through a few times. You can add them with everything else, but I like to leave them only half incorporated.

Spread the mix out into your tin to an even thickness.

Melt your chocolate, either in a bain marie or in the microwave, taking care not to burn it. Spread the chocolate out over the top of the tiffin to almost seal the top of it. FYI, You will need more chocolate than this if you use a pan with the larger surface area than the recommended 9×9, and depending on your taste, you may wish to use more anyway.

Pop the tin in the fridge for 1hr or so, until the confection is set. Chop up into inch squares and serve in a glorious mound of joy.


This stuff lasts well in an airtight container out of the fridge or in, and tastes awesome. Of course, it is super customisable with different biscuits, chocolate, fruits, nuts and even jelly beans or sweets if you like- just stick in what you like, leave out what you don’t. It’s also very rich, so even a chocoholic like me can’t trough the lot in one go, so that 9×9 worth of mix will go a really long way.

This recipe is so easy, too. If you have a microwave, you can make this. You can do the first step in a microwave if you need to, just melt everything in short bursts and stir in between.

I hope you’ll give this a go. It’s ‘civilised’ enough for a picnic or party, but relaxed enough for a night in with friends too. And it goes great with tea.

Later days!

sigdraft

BEDA: Addendum! Limes and Lemons

Hello kittens!

Earlier this month (a few days back, really) I posted about the delicious Lime Drizzle Loaf I made for my Easter shindig. Not more than a week later, and actually around the time I was writing up the recipe, I made the cake again but with lemons, for my mother’s birthday cake. It went down a treat.

It’s really easy to substitute Lemons and Limes in recipes to change them to your personal preference, or what you have in the kitchen at the time. A good sized lime is approximately half the size of a lemon, so if a recipe calls for the juice of a lemon, you’d need the juice of two limes. If your limes are particularly dinky (I’m looking at you, three lime net baggies from the supermarket) you may need to stretch to two and a half. Same goes for zest.

If you are looking for a citrus hit, lemon is the classic go to fruit, but I think limes have a much tarter and more complex flavour, so I highly reccomend switching it up from time to time. Also, fresh lime zest is the prettiest shade of green and looks fab. Once baked inside a cake it greys out a little, but it’s still eye catching.


Hope that helps, and have fun!

sigdraft

BEDA: Zingy Lime Drizzle Loaf

Despite the shoddy weather, spring has certainly sprung. For me, this means beginning to put away the stodgier recipes of winter, and embracing lighter, brighter flavours. What is brighter, I ask you, than citrus?

Last weekend, for my Easter shindig, I baked a bunch of delicious cakes to treat my guests with. The one that vanished the quickest was my Zingy Lime Drizzle Loaf. Flavour wise, it’s zippy and light, yet the sponge is sweet and light and creamy with a touch of vanilla. All cakes, in my humble opinion, are improved by a touch of vanilla.

Zingy Lime Drizzle Loaf

225g Caster sugar
225g Unsalted butter
4 eggs
225g Self raising flour
Zest of 2 limes
1/2 tsp vanilla
Juice of 3 limes
Additional 85g caster sugar

Preheat your oven to 180c, and grease and line a loaf tin with greaseproof paper.

Cream together the butter and sugar, before mixing in the eggs one at a time. Give the mix a good beat when combined.

Fold in the flour and combine until the mixture is uniform, then mix through the vanilla and lime zest.

Pour into the tin and bake for 1hr 5minutes. Depending on your oven, you may not need to bake the cake for more for 50 mins at 180c, so check it then. If it needs the full time, drop the heat to 160c to keep cooking for the remaining 10-15 minutes.

Let the cake cool in the tin. When cooled but still warm, prick the cake deeply with a skewer or cocktail stick.

Dissolve the sugar in the lime juice, and drizzle the syrup over the cake as evenly as possible. This should when truly cool form a sugary crust, with the cake moistened and enriched by the juice.

Serve in fat slices and enjoy.

As delicious and moreish as this cake is, in the instances I have tried it a true sugar crust hasn’t formed. This doesn’t affect the taste and the cake still has a glossy, slightly crisp top, but I leave you forewarned.

Let me know how you get on!

sigdraft

BEDA: Chocolate Beetroot Cake

Fun fact, kittens: I’m not a big fan of beetroot. Yes, it has incredible colour and it’s really good for you… but it smells funny.

However, I never skip it in my veg box for one simple reason: Chocolate Beetroot Cake.

IMG_4348

Chocolate Beetroot Cake

  • 200g Beetroot (about 3 medium beetroot, or 1 large and one small)
  • 125g Plain flour
  • 1 1/2 tsp Baking powder
  • A pinch of salt
  • 150g Caster sugar
  • 200g Unsalted butter (at room temperature)
  • 3 Free range eggs
  • 150g dark chocolate, finely grated
  • 200g icing sugar
  • A few drops of water

Cook the beetroot. If in doubt, check online for a method that suits you (read: microwave). I did mine by topping and tailing them, then boiling them 40 minutes-1 hour, until they fell off the fork when pricked through. For larger beets you’ll need longer, obviously, and if you are using multiple small beets, you’ll need less time.

Peel off the beet skin (your fingers under a cold tap works- washes the skin away and keeps you from getting scalded by those toasty beets) and grate or chop the beet flesh. Now, this is important: reserve some beet juice- about a tablespoon or so. You can get this by squeezing the grated/chopped beet.

Puree the beets into a pulp, as smooth as possible. A few lumps and bumps won’t matter.

Preheat the oven to 190 c and grease your cake tin. I used a bunt tin, because bunt tins are fun, but a 8 inch cake tin works fine too. At this time, melt the chocolate in a microwave or on a bain marie, taking care not to burn it.

Separate the eggs, and beat the soft butter, egg yolks and sugar together into a sunshiny paste. Whisk the whites to stiff peaks separately.

Sieve the dry ingredients together (or, if you are lazy like me, use a whisk- does the same job in minutes), and then fold in the yolk mix and chocolate until mostly combined.

More gently this time, fold the whites into the mixture third by third. When almost combined, stir in the beet pulp until the mixture is uniform, but not over beaten.

Pour out evenly into your bunt tin and bake for 45-50 minutes. I would check at 35-40 minutes. The cake is ready when a skewer comes out clean, or ideally with a couple of damp crumbs attached.

While the cake cools, mix your icing sugar and the beautiful purple beet juice to make a gorgeous pink glaze for your cake. You can add more icing sugar, or more water, should you need to in order to achieve the runny consistency you need. It should be a free flowing glacé icing, but not too thin.

When the cake is cool, turn it out and pour over the glaze. Serve in generous slices or chunks.


Considering that carrot cake doesn’t really do it for me, I didn’t have the highest hopes for this bad boy. Thankfully, I was SO wrong. Delicately crumbed, super moist and full of dark earthy flavours from the chocolate and ‘roots, this cake is such a keeper. Alas, it doesn’t last so very long, and needs to be polished off within a couple of days if kept out of the fridge, perhaps within 5-7 days if kept in the fridge. What a chore that’ll be.


Enjoy!

sigdraft


BEDA: Chocolate Kissed Honey Flapjacks

Whilst they weren’t the first thing I ever learnt to bake, Flapjacks evoke strong and nostalgic memories for me. I remember in year four or five bringing home a tin of flapjacks I had made in cookery class at school, and presenting them to my parents. They were mostly stuck to the greaseproof paper, and I remember the sweet gooiness of them, between picking out bits of chewy tacky paper. I think my father snuck most of them.

Valentines Day holds no happy memories for me, so every year I have two choices- stay very busy, or wallow. Either way, I eat my weight in chocolate. This year I arranged days out and visiting with friends, and, erm, a date for the inauspicious weekend, and baked up a storm of choccy drenched treats for my friends. This included my first venture in perhaps twenty years into flapjack making. Which is ridiculous, really, because they are sickeningly simple and damned delicious.

The ingredient breakdown for this recipe is so easy to remember, it’s become a staple bake for me. You can substitute the honey for golden syrup, but unless you do this for diet reasons I will judge you quite a bit. Honey is infinitely tastier. That being said, should you be of the Vegan persuasion, then of course, substitute in syrup for honey and any Vegan friendly spread for the butter (I recommend Pure).


IMG_4347


Chocolate Kissed Honey Flapjacks

  • 200g Butter
  • 200g Local Honey
  • 200g sugar (approximately half dark brown and half caster provides the best flavour, but use what you have)
  • 400g porridge oats
  • 100g dried cranberries
  • 100g dark or bittersweet chocolate

Line a Swiss Roll tin, or any 13″ x 9″ pan with a strip of greaseproof paper, and preheat the oven to 180 c.

In saucepan, melt together the butter, honey and sugar. Do not allow to boil- just heat and stir until the sugar is dissolved, the butter melted, and the whole glorious mixture is combined.

Next, dump in your oats in roughly half batches and stir in until the liquid coats the oats and you have no dryness of spare fluid.

Mix the cranberries in, and spoon out the mix onto your tray, pressing down and flattening with your spoon into the corners.

Bake for 15-20 minutes until golden. If you over bake don’t worry, they’ll just be more cookie like than chewy.

Cool in the tin.

Once cool, melt the chocolate in the microwave or a bain marie, taking care not to burn it. Kiss the surface of the flapjacks with trickles and drizzles and blobs of cocoa-y goodness, and let it set at room temperature.

To serve, lift the sheet of paper to remove the flapjacks in one fell swoop, and chop into generous bars or squares. Store in a airtight container for up to 10 days… if they last 10 minutes, that is.


Obviously you can omit the chocolate if you hate yourself, or substitute in any fillings you like (including, of course, chocolate). However the sweet, bright tartness of the cranberries is perfect with the comforting, sweet and rich oaty base. Whatever you do, be sure not to skimp. Never go under 60g of filling, or else it’ll be too sparse in the mixture.


Let me know how you make yours!


sigdraft