Advent Calendar 8: Stoverij

Hasn’t the weather turned super chilly of late? All I want to eat is warming soups and stews and live under a duvet. Alas, I have to, you know, work and such, so this ideal is not feasible 24-7, but eat least when I have the time I can whip up something warming and delicious.

Stoverij is a belgian comfort and/or drunk food that is well loved. It’s traditionally served with chips, which makes it probably the best stew in the world. It’s also full of rich beef, beer and chocolate. Does it get any better?

Stoverij

  • 1 carrot
  • 1 leek
  • 1 small onion
  • 400g stewing beef, cut into inch cubes
  • handful of plain flour
  • knob of butter
  • salt and pepper
  • 1 tbsp dried thyme
  • 1tbsp brown sugar
  • 500ml ale
  • Beef stock cube
  • 25g dark chocolate

Heat some oil in a pan, and brown the beef in 2-4 batches. Try not to over-crowd the pan, or the beef will stew rather than brown off nicely.

IMG_6861

Chop the veg into small pieces and fry off in the butter for approximately five minutes, or until soft.

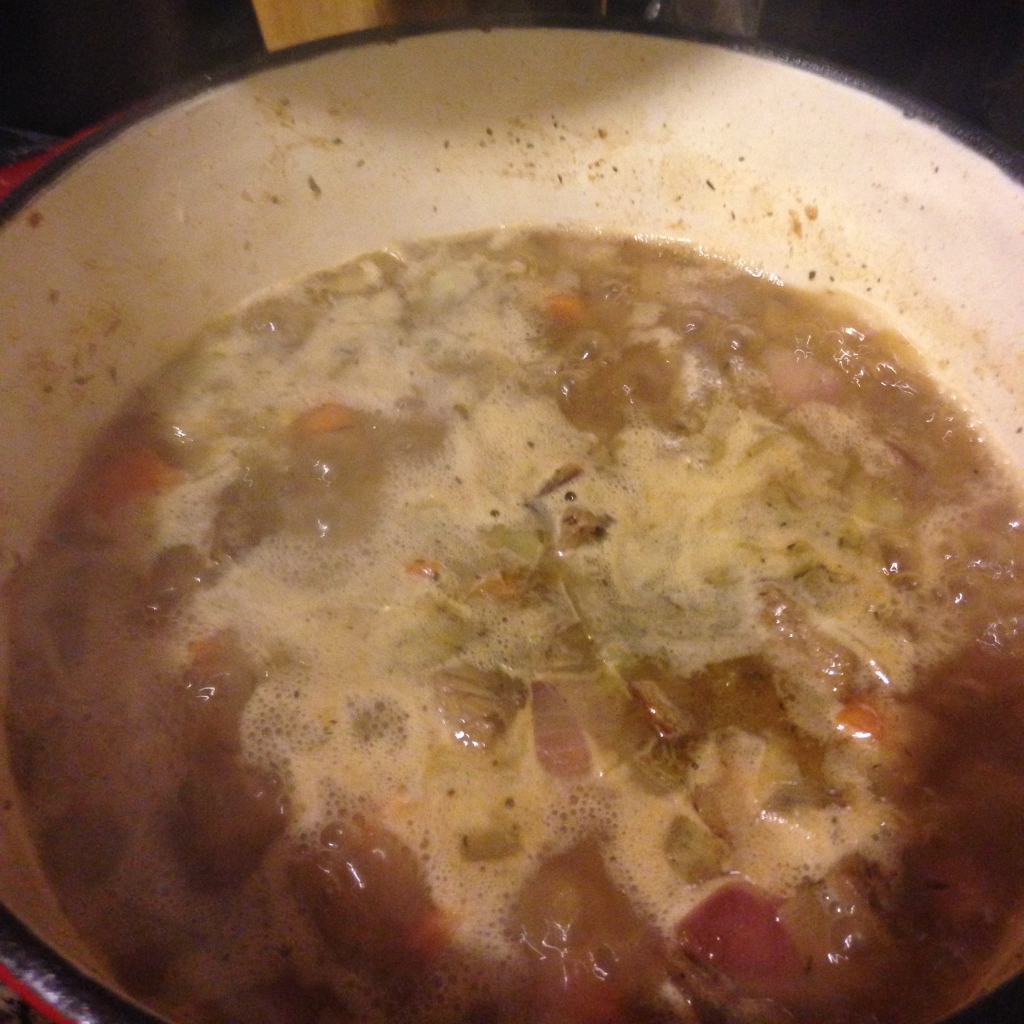
Sprinkle over the flour, sugar, seasonings and herbs. Deglaze the pan with a glut of the beer and stir the ingredients through.

Crumble in the stock cube, add the rest of the beer and return the meat to the pan. Stir through, then cover and lower the temperature pretty much as low as it will go. Cook for 2 hours until the meat is soft and the sauce thick. If your sauce isn’t thick enough, remove the lid, raise the heat and give it a good blast for 10-30 minutes.

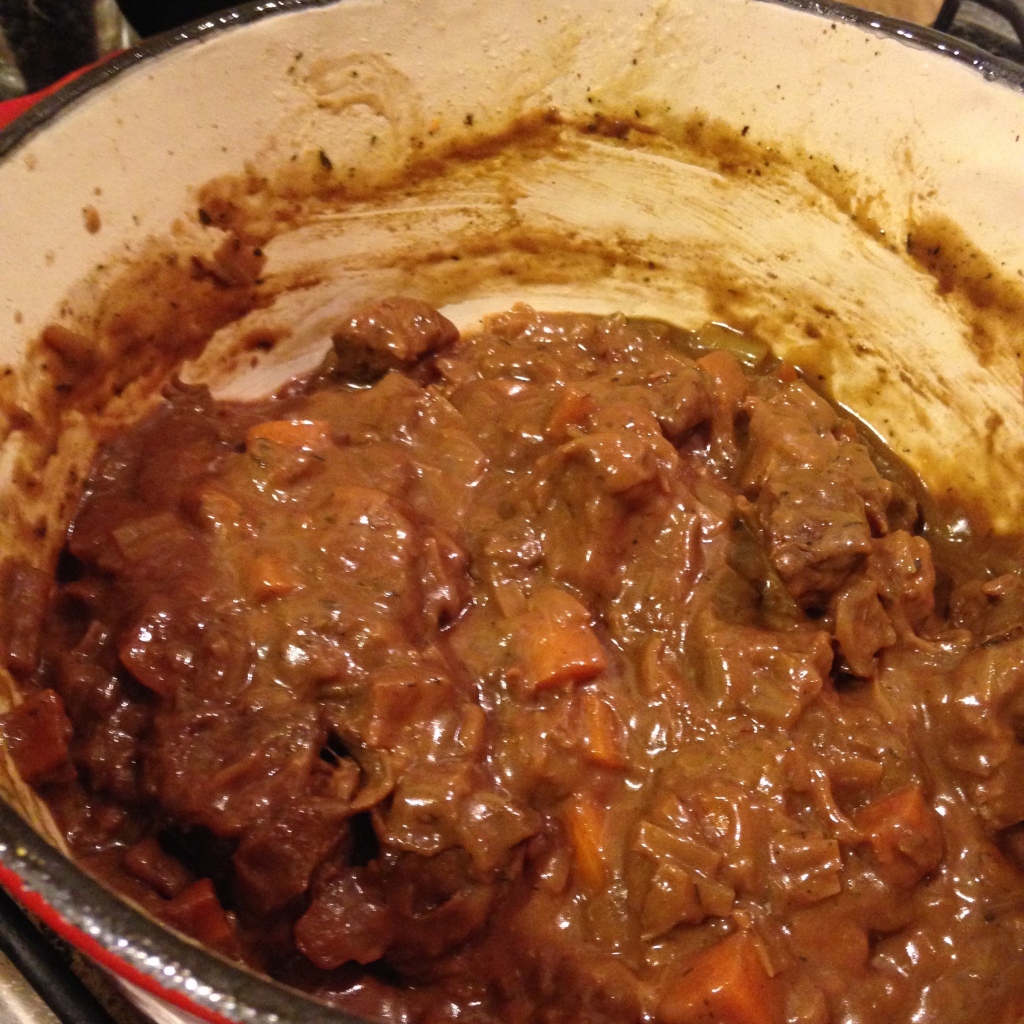
Finish with the chocolate, stirring it into the sauce to melt it down. This will leave you with a rich, cocoa scented stew. Serve with chips if you want to go full Belgian, or mash and vegetables.

IMG_6869

I love this stew- it is pure and indulgent comfort food. It goes great with any veg (particularly my candied carrots) and potatoes, and the silky, rich gravy is addictive. If you haven’t, for any reason, access to beer, you can replace it with stock, cider or wine, though this will affect the flavour/authenticity.

Stay warm, kittens!

sigdraft

Advent Calendar 6 and 7: Christmas Chutney and Cranberry-Red Onion Marmalade

It doesn’t get much more festive than Cranberries. They’re in season over the festive period, they’re santa-suit red and they taste phenomenal with meats and cheeses- staples in many a Christmas feast. They also have a very high pectin count, meaning they make excellent additions to preserves, helping them to set beautifully.

Cranberry sauce is great and all, but we can do better at SWB this year. Plus, a good chutney or savoury marmalade is a fabulous addition to any cheeseboard or buffet. Here are two of my Christmastime favourites I’m making up for my own Christmas dinner, plus extra for gifts.

Christmas Chutney

This recipe is childsplay to throw together and packs a great flavour punch. It goes great with sharp cheeses or meats in sandwiches, and can be made, start to finish, in under 45 minutes., including any chopping.

  • 400g cranberries
  • 400g cherry tomatoes (you can use regular tomatoes, just chop them up first)
  • 1 medium red onion
  • 1/2tsp ground black pepper
  • 1/2tsp ground ginger
  • 1/2tsp ground allspice
  • Pinch of salt
  • 200g light muscovado sugar
  • 100ml cider vinegar

Chop the onion into rough slices.

Pop the cranberries, onion and tomatoes into a saucepan over a low heat, and heat for 10 minutes, until the berries start to pop.

Add all the remaining ingredients and stir to combine and dissolve the sugar.

Simmer the chutney for 15-25 minutes until the chutney is combined and pulpy.

Pot into sterilised jars, or store in the fridge.

IMG_6848Next up is a delicious red onion marmalade with the festive twist. If you don’t want to use the cranberries, use an extra 400g of onions instead for a true red onion marmalade.

Cranberry and Red Onion Marmalade

  • 500g red onions
  • Juice of an orange
  • pinch of salt
  • 1/2 tsp black pepper
  • 1/2 tsp ground gunger
  • 1/2 tsp ground cinnamon
  • 1 tsp ground allspice
  • 1/4 tsp ground cloves
  • 1/4 tsp ground coriander
  • 200g dark muscovado sugar
  • 150ml ruby port
  • 100ml cider vinegar
  • 400g cranberries

In a glug of oil, fry the onions off until translucent.

Add the orange juice, port, vinegar, sugar and all the spices. Stir through to combine and dissolve the sugar.

Simmer the mixture gently for 35-40 minutes. The mixture should be nice and syrupy by this point.

Chuck in the cranberries and turn up the heat a little. Cook for a further 15-20 minutes, until all the berries have popped and the mixture is nice and thick.

Pot into sterilised jars and store in the fridge.


Enjoy!

sigdraft

Advent Calendar 5: Mulled Cider

Sometimes the world is out to get you. Hard days and long nights don’t take a holiday because it’s Christmas. Therefore, here is a recipe that will cute your ills, soothe and warm you, and get you well on your way to being merry.

Mulled Cider

  • 1 litre still dry cider (I used Snakecatcher by New Forest Cider)
  • 3 cloves
  • 2 star anise
  • 1 cinnamon stick
  • 1/2 vanilla pod, split
  • 1/8 tsp ground nutmeg
  • Juice of an orange
  • 50ml calvados
  • 50ml pomegranate juice
  • 3tbsp caster sugar

Warm up the cider until steaming. Meanwhile, measure out your dry and wet ingredients.

Chuck in your spices and juice/booze mixture and give everything a good stir. Bruise the cinnamon stick and vanilla pod with your spoon as you do so.

Bring the pot up to a boil, then turn it back down to a simmer for 5-8 minutes

Serve piping hot in heatproof cups.

IMG_6788

This recipe is based on Jamie Oliver’s recipe for the same, with a few measurements tweaked, and an extra dose of booze to warm your cockles. It’s a damn good recipe, so I didn’t need to muck about with it much. Sweet, fruity, boozy and oh so quaffable- this is going to be my go to mulled beverage this year.

Enjoy!

sigdraft

Advent Calendar 4: Christmas Cake

If you are anything like me, then the year has gotten away from you, and half a moment ago it was halloween, and you were overdue for making your Christmas cake, and now, BAM! It’s December 4th, and you still haven’t done it. Do not despair, dear ones. It is not too late.

Contrary to popular belief, you don’t *need* to make a Christmas cake months and months in advance. Sure, you get more time to feed it to boozy godliness if you do, but it is not essential. So long as you make your cake 3-4 weeks before the big day, you will have plenty of time to get in plenty of feedings to have a delicious, brandy spiked delight to serve on Christmas Day.

The recipe below is adapted from Delia Smith’s age old and much loved Christmas cake recipe. I’ve really only removed the nuts (I prefer the texture nut free, personally), tweaked the spices to my preference, and altered the fruit a little (cranberries > currants).

Christmas Cake

  • 750g dried fruit (you can pretty use whichever dried fruits you like in this mixture. I used approximately 100g glacé cherries, 200g sultanas, 200g raisins and 250g dried cranberries)
  • 50g candied peel
  • 3tsbp brandy
  • 225g plain flour
  • pinch of salt
  • 1/2tsp ground ginger
  • 1/2tsp ground cinnamon
  • 1/4 tsp ground nutmeg
  • 1/4 tsp ground cloves
  • 225g butter
  • 225g soft brown sugar
  • 4 free range eggs
  • 1tsbp treacle
  • Zest of 1 lemon and 1 orange

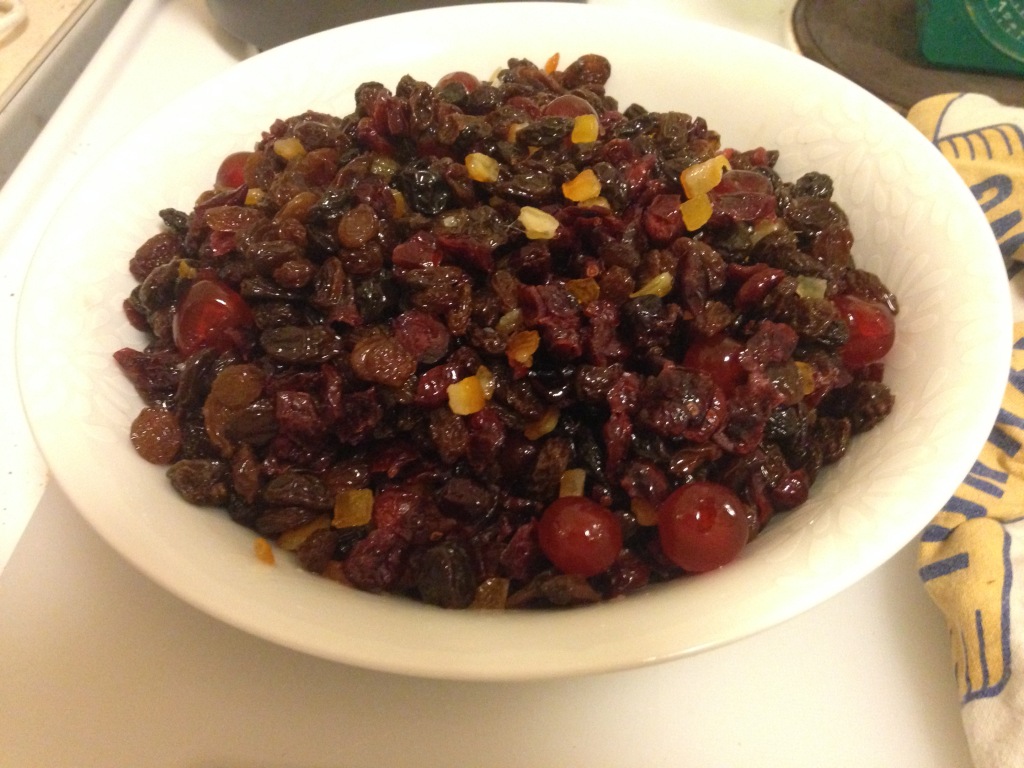
9-12 hours before you want to make the cake, or the evening before, weigh out the fruit into a mixing bowl (If you like, you can chop your cherries, but I prefer them as whole gleaming jewels in the finished cake). Drizzle the brandy over the fruit and stir to ensure all the fruit is coated. Cover the bowl with a tea towel and leave the fruit to steep. If you are able, the odd stir during this process will only help the absorption.

IMG_6780

Preheat the oven to 130-140c and double line an 8 inch cake tin with greaseproof paper. Prepare a double layer of greaseproof to sit on top of the cake in the oven too. This will help protect the cake from over-browing during its long and slow baking.

Weigh out your flour and measure out your spices. Sieve or whisk together to remove lumps.

In another bowl, cream together the butter and the sugar. Beat the eggs, and mix into the butter mixture in 2-4 parts until completely incorporated.

Add the flour mix into the wet ingredients and fold to combine.

Finally add the zest, treacle and fruit, and fold into the mixture until it is uniform.

Pour the cake batter in the prepared tin, cover with the paper ‘lid’, and pop it in the oven for 4 and 1/2 hours. If your oven is particularly fierce, check at 4.

Allow to cool completely in the tin before removing the cake to an airtight container. Poke the cake full of holes with a toothpick, and drizzle in a healthy plug of brandy. Repeat this process at least once a week until you are ready to ice the cake, flipping the cake over each time to ensure an even feeding.


Like a lot a festive recipes, this cake is super easy, it’s just time consuming, and contains a lot of ingredients. Making your own Christmas cake is a labour of love, and will rapidly become a tradition in your household, if for no other reason than the phenomenal scent of it baking for hours on end. With so many steps before the cake is baked, and after, theres plenty to get the whole family involved in. If you are tee-total, use strong tea instead of brandy in the first step, and simply don’t feed the cake. It will keep well enough if it is kept airtight.

Enjoy!

sigdraft

Advent Calendar 2: Beef and Apple Slowcooker Stew

This recipe is a simple winter warmer that anyone who is old enough to operate a frying pan and use a kitchen knife can make. And if you fall into the younger brackets of that age group, I think you should make it. Here’s why.

Christmas is the time of year that children have oodles of time on their hands, and weary students trundle home for a break from their studies. It’s the time of year that parents break the bank to spoil their loved ones, and also pick back up the full time care of their children, no questions asked. To have one of their own offer to take over the cooking, even for just one meal, would be a huge help to them and greatly appreciated.

All you will need to make this delicious and hearty stew (beyond the ingredients) is a frying pan, a knife and a slow cooker, or an ovenproof lidded saucepan. The measurements below are for a slow cooked meal. If you don’t have access to a slow cooker, reduce the cooking time to two hours, and add at least an extra litre of water.

Beef and Apple Stew

  • 400g stewing beef (shin is excellent in this dish, but any tougher cut will work fine)
  • 1 onion
  • 3 large carrots
  • 1 eating apple
  • ½ tbsp mixed herbs or a bouquet garni
  • 2 stock cubes (beef or vegetable)
  • 500ml cider
  • 1tbsp cornflour

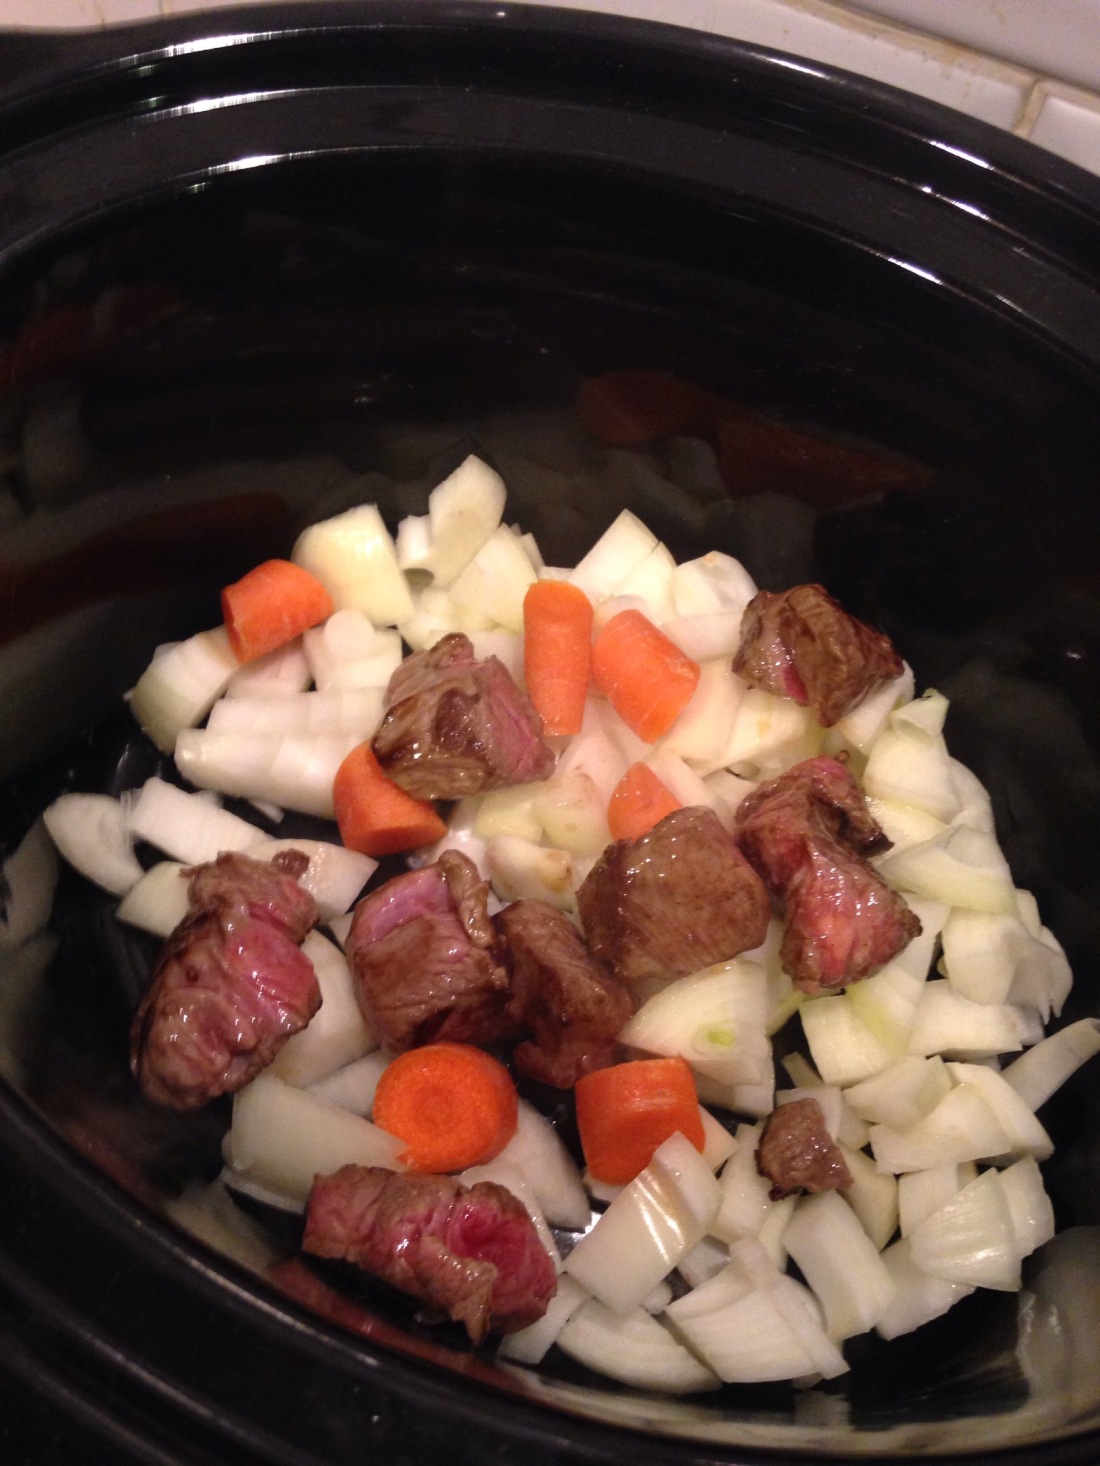
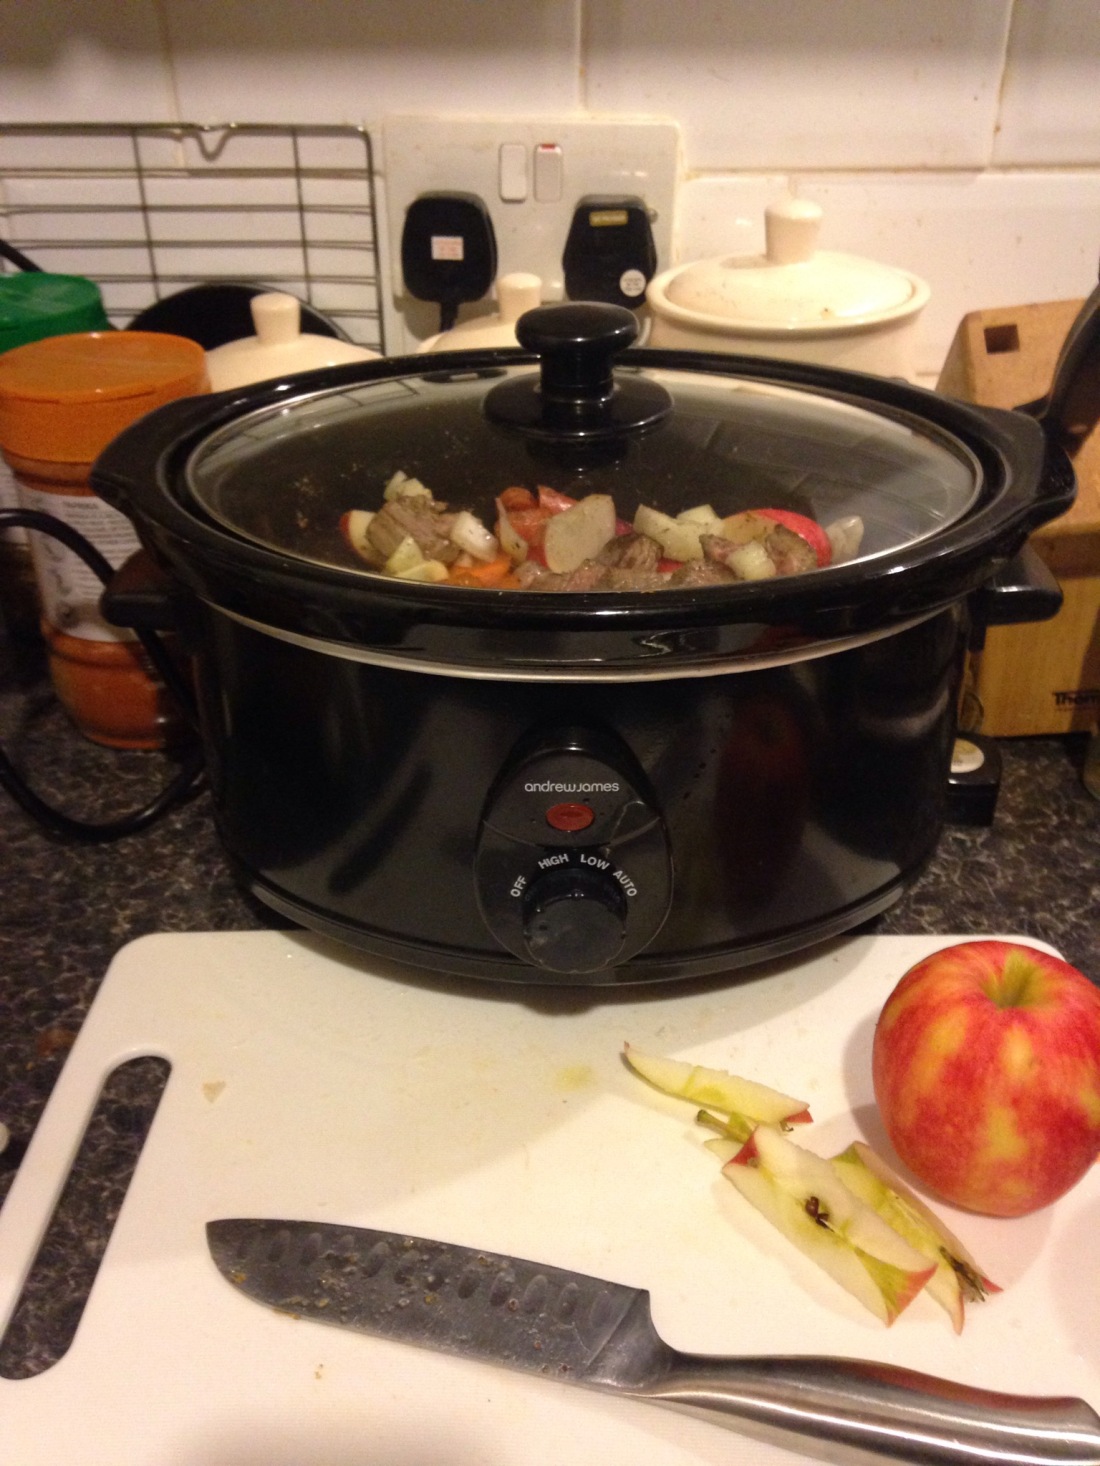
If your beef isn’t already in bitesize chunks, cut it up. Then, brown it in a frying pan, taking care not to overcrowd the pan. You want nice caramel colouration on all sides of the pieces. Once browned, pop the cooked beef into the pot of your slow cooker.


IMG_6772.JPG

Core the apple, and chop it and the other veg into bite size pieces. Add them to the pot and mix them into the beef pieces.

Sprinkle over the herbs, crumble in the stock cubes and add plenty of salt and pepper.

Pour over the cider and mix the ingredients together. This may seem like a rather small amount of liquid, but so long as the liquid is about half as deep as the whole mixture, you should be fine.

Pop the lid on the slow cooker and turn it on to ‘high’. Cook for 3 hours.

IMG_6773-0.JPG

Mix the cornflour with a drizzle of water until a paste is formed. Add this to your stew and mix through thoroughly. Recover the pot and cook for a further two hours. (It bears mentioning that this would be very early to add a thickener like cornflour in most recipes, but in slowcooking so little moisture is lost that its fine to add the flour now. It won’t thicken the sauce too much- it’ll just help it become more gravy-like.)

Serve with mashed potatoes, braised leeks and any other veg you fancy.

This recipe is pretty flexible- it would work very well with pork or rose veal, and you can replace the cider with beer or water if you like. You can also feel free to add other vegetables, or reduce the beef and up the veg content.

The final product, after barely half an hour of actual labour, is aromatic and flavoursome. The cider gives tart fruitiness, while the beef makes it intensely savoury and satisfying. The apple will likely melt away to thicken the gravy, leave the inoffensive peel to blend in with the other veg. If you want to be pedantic and peel your apples, then do, but it really isnt necesscary.

So there you have it- an incredibly easy and tasty meal to warm your cockles this winter.

Enjoy!

Cosy Crumble

Halloween has been and gone. Guy Fawkes’ Night is almost upon us. Christmas is just around the corner. Comfort food season has truly arrived.

When it comes to comfort food, some of the best dishes, whilst simple, take a long time cooking. That’s fine- gives you time to get on with Christmas card lists and catching up on Downton. However, I work pretty much full time, I’m surprisingly lazy, and I want my comfort food done quick. When it comes to main meals, that often means reheating portions, or pasta for me. When it comes to dessert, it means crumble.

You can’t go wrong with an apple crumble- they’re universally popular and extremely versatile. Autumn is apple season, but they are readily available all year round and as such are a kitchen staple, as are the rest of the ingredients in this simple but delicious pudding. Frankly, anyone who doesn’t like crumble is probably a cyborg, anyway, and as such should be cut from your social circle.

Here’s how I make a dessert in minutes, that goes in the oven to cook as soon as the main meal is out. Apologies for imperial measurements- this is how I was taught to make crumble by my mum, and it’s how I remember it.

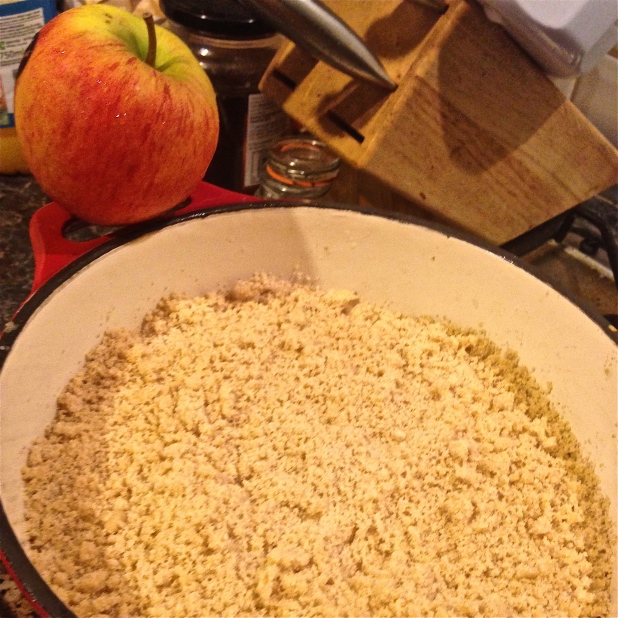
IMG_6556


Cosy Crumble

  • 4oz Butter, cold
  • 4oz Caster sugar
  • 4oz Plain flour, plus an additional 1-2oz as required
  • 1tsp Cinnamon
  • 5 Eating apples (I used Braeburns. You can use cooking apples, but you will probably only need four, and you may wish to add additional sugar
  • Juice of half a lemon
  • 4oz Sultanas
  • Demerara Sugar and a further scant tsp Cinnamon to finish


Preheat the oven to 180c, or use a hot oven following cooking a main meal.

Rub the butter, caster sugar and flour together with your fingertips to form a crumbling crumb. If the mix is too soft and wet, add the additional flour an ounce at a time and try to crumble it again. Once the mix is working, don’t be too pedantic about crumb size. You don’t want to overwork the mixture, and I like the rustic look.

Next, peel and core your apples. Chop into bite size pieces- about 12 chunks per apple. Place the apple in your ovenproof dish, and acidulate as you go with the lemon juice.

Scatter over the sultanas, a good pinch of Demerata sugar and some cinnamon (a scant 1/2 tsp should suffice), and briefly mix the contents together. Try to even out the top a little.

Pour over the crumble topping in a thick layer, and sprinkle with another hefty pinch of Demerara and another scant 1/2 tsp of cinnamon to finish.

Bake for 30-35 minutes, until the top is crisp and slightly caramelised. Serve with lashings of custard, cream or ice cream, and scoff greedily.


If you really HATE sultanas, of course you can omit them. However, they plump up beautifully, and add a beautiful depth of flavour, and amber jewel tone quality to the dessert.

Go make this. RIGHT NOW.

Love and cuddles!

sigdraft

Vanilla Latte Cake

I’ve said it before, and I’ll say it again; you’d be hard pushed to find a cake that isn’t improved by a splash of vanilla. This goes double for coffee cake.

I’m one of THOSE people. I take syrup in my coffee. Don’t get me wrong, I like my coffee long, strong and life giving, but I’m not sweet enough to take it with out a little sassy sugar hit. My go to drink if I’m caught at a coffee joint I’m not familiar with is to order a Vanilla Latte. I’m usually going to be safe with that. So, when I was making a coffee cake not so long ago, I thought, hang on… I can make this BETTER.

So I made a light coffee sponge, sandwiched it with a whipped coffee-vanilla buttercream that’s got so much java in it, it could wake the dead. Ta daaah. You’re welcome.

Vanilla Latte Cake

For the cakes:

  • 225g Butter
  • 225g Light muscovado sugar, caster sugar or a blend of both, depending on your supplies
  • 225g Self-raising flour
  • 1tsp Baking powder
  • 2tsp Vanilla extract
  • 4 Free range eggs
  • 4tsp Instant coffee
  • 1tbsp Boiling water

For the buttercream:

  • 150g Butter
  • 350g Icing sugar
  • 1tsp Vanilla extract
  • 4tsp Instant coffee powder
  • 1tbsp Boiling water
  • Cocoa powder to finish

Preheat your oven to 180C or the equivalent. Grease and line two 8inch round cake tins.

Boil the kettle, and add the boiling water to the first lot of coffee powder in a small container. Mix together until all the coffee is dissolved into a syrupy consistency. Set aside.

Cream together the butter and the sugar, then mix in the remaining ingredients until a uniform and smooth cake batter is formed.

Finally, mix the coffee syrup into the batter evenly, then divide the mix between the two prepared tins.

Bake the cakes for 25-30 minutes, until an inserted skewer comes out clean and the cakes are shrinking from the edges. Allow to cool in their tins, or on a rack.

When the cakes are cold, you can either leave them as is for a fatly layered cake, or slice each cake in two and have a four layer cake. If in doubt or lacking confidence or time, do the former.

With the boiling water, make up another batch of coffee ‘syrup’.

Beat together the butter, sugar, vanilla and coffee until a thick, luxurious buttercream forms. spread a quarter of the icing over the bottom layer of the cake, then top it with a next, and so on, until the top, where the remaining generous quarter should be spread evenly then swirled for a pretty finish. Dust with cocoa powder to complete the whippy latte look, and serve this aromatic delight with coffee or tea.


I wish I had a picture of this delight to show you, but what with camera issues this year and how fast this cake vanishes, I simply don’t. Trust me when I say that this cake is as aromatic and delicious as it is pretty. It’s perfect for celebrations- I find all multi layer cakes a bit festive. If you want to kill with kindness, make an extra sponge (so half the recipe), and stack them up with oodles of icing (one and a half to twice the recipe above) for a true monster that will drop jaws. The amount of buttercream yielded from this recipe is enough for generous layers between the cut cakes, and on top, but if you want to cover the whole cake, which looks a little more polished, make one and a half times this amount, or double to be on the safe side.

I’ve made this cake for a friend’s birthday, and given one to a non-profit event, and in both cases they flew. It’s a real crowd pleaser, and you deserve to make one for yourself.

Enjoy!

sigdraft

Red Berry Pavlova

I love meringue. As a child, when my brother and I went with a parent to the baker to buy bread for the weekend, we would often be allowed a treat. Hot sausage rolls were one of our favourites (and I’ve never had one better, even if I can’t really process pork and they made me ill in the long run), but if we went for sweet things, I would nearly always pick a meringue pig, or dog, or sheep, or whatever animal they were doing that day. There’s something so perfect about the crisp outer shell yielding to gummy, soft, insides. Fluffy and crunchy and so, so sweet and light. Mmmm.

For a big family party, I volunteered to make a few desserts. One was the lovely fruit salad I shared a week or so ago. Another was a fabulous three tiered red velvet cake. The third was a sumptuous double layered Red Berry Pavlova.

photo-22

This is originally a Jaime Oliver recipe, and boy did good. I’ve never had much luck making my own meringue in the past, but this time it came out perfectly. The only thing you really need for a pavlova is time. This meringue recipe would work perfectly for individual nests or biscuits too, but here’s how I made my pavlova.

Red Berry Pavlova

  • 6 Egg whites
  • 300g plus 2 tbsp Caster sugar
  • Pinch of salt
  • 400g Strawberries, hulled and halved
  • 400g Raspberries
  • 400ml Double cream
  • Plenty of sprigs of fresh mint

Preheat the oven to 150c. Line 2 baking sheets with greaseproof paper, and outline a 20cm/8inch diameter ring on each with pencil.

Either in a stand mixer or in a bowl with an electric whisk, beat up the 6 egg whites at a medium pace, until you reach firm peaks.

Next, add your salt, then gradually add your sugar about 1/6-1/4 at a time, all while the beaters are going.

Once the sugar is incorporated, whack the speed up really high- damn near as high as it’ll go, and beat the meringue for 7 minutes. The transformation will be incredible- the mix will become voluminous, thick, stiff and bright white. After seven minutes test the meringue for graininess. No grains means you’re good to go. If not, beat it for a minute or two more.

Spread your meringue into rings on the baking sheets. I like to make a well in the middle with a higher, crown like rim. Use your stencil as a guide for size, and bear in mind the meringue will expand further in the oven.

Bake for 1 hour- they should be risen and ivory. Turn off the oven. Moisture is the death of meringue, so my advice is to cool the meringues in the oven, but you could cool them on a rack if you are in a rush.

When you are ready to assemble the pavlova, whip the remaining sugar and all the cream to stiff peaks and spread half of it on the bottom meringue ring.

Stud the middle layer of cream with half the strawberries and raspberries- any slightly ugly or softer ones can go here.

Sit your second ring of meringue on top of the first, top with the rest of the cream and the remaining berries. Decorate with sprigs of fresh mint. Serve immediately, or refrigerate in an airtight container.


This dessert is special, yet not particularly difficult, particularly if you use a stand mixer. You just need to be able to tell what stiff peaks are (if in doubt, youtube is full of tutorials) and the rest of the work the mixer and oven do. When I stayed in New Zealand, they had pavlova after nearly every sunday roast or big family meal- they just stuck the meringue in the oven after the main meal was done to cook in the residual heat. The method above does call for actual cooking, and you get a crisper meringue for it, but it’s certainly something you could do in the same manner.

It’s a no brainer that you can change the fruit for anything you fancy. Since you eat it fairly fresh, wet fruits like soft berries are too much of a problem. Blackberries, currants, kiwi fruit, even sweet citrus would work well here. Can you imagine a creamsicle flavoured pavlova? Oh my goodness. And the mint here isn’t just a garnish- it tastes awesome with the berries and cream.

The soft summer fruit season is coming to a close, so give this delicious dessert a go while you can.

Enjoy!

sigdraft

Spiced Blueberry Jam

I have been teasing this recipe for too long, but here it is- Spiced Blueberry Jam. The timing is pretty good actually- british grown blueberries are coming into season, to the time is right to capture their sweet ripeness to savour year through.

Not so long ago I was preparing a gift for my father’s birthday, when I realised I hadn’t made him a cake. And looking around my kitchen, I actually didn’t have enough butter or eggs to make him one. Que Desastre! Well, not quite.

Preserves make wonderful gifts- they are artisan, and require if not ‘mad skills’, then at least concentration and timing. They’re also delicious and multi functional- jams especially can go on bread, in cakes, in yoghurt… They also last a wee while, unlike more perishable goods like cakes and bakes, so they carry on giving for some time. They’re also pretty darn customisable.

I love blueberries, not just for their colour but the sweet, almost buttery fresh flavour, so unlike red berries, or even other berries of a similar colour like Blackberries and currants. I also, if you haven’t twigged from reading this blog, j’adore warm, fragrant spices. This jam, and it really does jam up a treat, combines these two great flavours together to make sweet, aromatic, deep indigo goodness worthy of the finest of slices of toast.

Spiced Blueberry Jam

  • 700g Blueberries
  • 225mls Orange juice (about two oranges worth)
  • 2 Star anise
  • 1 Cinnamon stick
  • 700g Jam sugar

If you haven’t already, thoroughly wash out 2-4 jars, depending on their size. Set them in a low oven (about 100-110c) to dry and warm.

Give your cinnamon stick a couple of whacks with the back of a knife to bruise it, then toss it in a pan with the blueberries, orange juice and star anise.

Cook the berry mixture on low to medium heat for about 15-20 minutes, or until the berries are very soft and pulpy.

Add in the sugar, which contains all the pectin you’ll need, and stir it through until it dissolves.

Bring the mix up to the a rapid boil for three minutes, then remove it from the heat. Discard the spices, and pot the beautiful violet jam into your warm jars. Close the tops almost completely, then fully seal when completely cool.

Store in a cool place, or refridgerate.


So there you have it: a simple, but a little different, preserve that is fruity and bright for summer, and warmly spiced for winter. You can use frozen berries in this recipe- just allow them a few extra minutes to thaw in the pulp-ifying stage. You can also play with those spices- vanilla or cardamom would be divine.

Enjoy!

sigdraft

My Chilli con Carne

I love Texmex food- I think you’d be hard pushed to find anyone who doesn’t at least like the stuff. Comforting rice or corn, filling, delicious meat, rich tomatoey sauces and warming spice; Tex Mex is the real deal, and great comfort food. I love how hearty and filling it is, yet how light and summery those same flavours can be.

I hated spicy food growing up, and I was the fussiest eater known to man. I started growing out of it, weirdly, when I got my first rats. I’d buy vegetables for them and think, hey, if it’s good enough for them… and once the first hurdle was passed my attitude changed. When it came to new foods I figured, hey, if I don’t like it, I won’t eat any more of it. I’m sure glad I became more adventurous, even if I did miss years of delicious veggies and tasty spicy meals. My mum did most of the cooking when I was a kid, but both my parents could cook a really hearty chilli, usually out of a repurposed Spag Bol. I love my bolognese too much to change it, except into a lasagne, so these days when I cook my super tasty and aromatic chilli, it’s from scratch and to purpose.

I’m pretty sure quote unquote “traditional” chilli doesn’t have red kidney beans in it, but mine does. My parents’ always did, and I love the buttery, nutty texture of the beans. It probably also doesn’t have fresh carrots, or peppers, but again, my ‘family’ recipe always had carrots in from the bolognese sauce, and I love the colour and flavour the fresh peppers bring to the dish. Also, you know, vegetables. They’re kinda good for you and stuff. Looking at the recipe below, there are loads of ingredients, yes, but this is really a simple dish to make, promise.

Chilli Con Carne

  • 2 medium onions
  • 4 medium carrots
  • 2 peppers (green and red, or red and yellow… two different ones!)
  • Splash of olive oil
  • 500g minced beef
  • 1-2tsp chilli powder
  • 2 tsp ground cumin
  • 1 tsp ground coriander
  • 1 tsp paprika
  • A smidge of cayenne pepper- no more than a 1/4 tsp
  • 1 1/2 tsp oregano
  • Salt and pepper
  • 1 tin/400g chopped tomatoes
  • 2 beef stock cubes dissolved in 1 1/2 mugs of boiling water (approximately 300ml), or the same of strong beef stock
  • 1 tin/400g kidney beans

Chop your onions and get them sweating in the oil over the medium to high heat.

Next chop your carrots into half moons, adding to the pan as you go.

Finally chop up your peppers and add them to the mix. Sweat the vegetables off together for about 5-7 minutes, making sure they don’t catch.

Measure out your spices- use your favourite chilli powder, and go as hot as you dare. This is also a good time to put the kettle on. Add the spices to the pan and stir them through the vegetables over the heat to warm them.

Add your meat and with the spoon break it up, turning it through the vegetables as it browns. Add a pinch of salt and a couple of pepper.

Dissolve the stock in the water. Add the tomatoes to the pan and rinse the tin out with a splash of stock. Add this to the pan, followed by the rest of the stock. Stir through.

Let the mixture simmer for 20-30 minutes, checking it and stirring it every 10-15 minutes to ensure it doesn’t catch. Taste and adjust the seasoning (chilli, salt and pepper) to taste.

When the mixture is nearly reduced enough, drain and rinse your beans and stir them into the sauce. Cook for a further 5-10 minutes.

Serve with rice or a jacket potato, plenty of cheese and sour cream.


This Chilli is so rich and flavoursome and comforting I can eat it cold in sandwiches. It’s also a great filling for quesadillas and stuffed peppers, and scrummy on nachos. It’s such a joy to make because it’s so easy- all the stages of prep fit in to one another so perfectly and it doesn’t take too long to thicken and finish. This is a great recipe for students, newbie cooks, those feeding hungry kids and teens and even for a single career-girl in her mid twenties like me- extra portions freeze perfectly. This recipe yields a good five portions, seven more modest ones, so it’s a lovely thing to throw together for friends for a chilled out tea together. Like I said earlier in the post, I think the bright spice flavours make this lovely for summer (whether on the jacket or in lettuce wraps!) yet warm and cosy for winter (with lots of rice or potatoes). Of course, it’s easy to customise too- you can swap the beef out for turkey mince or Quorn mince for a start. If you love garlic, feel free to add some minced cloves in with the onions, and you can replace the dried chilli powder for two fresh chillies, or add both for a really potent mix.

Enjoy!

sigdraft